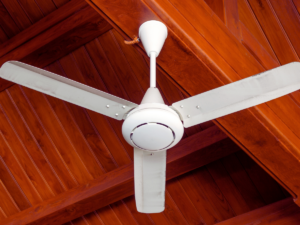
How Do I Choose the Right Size Ceiling Fan for My Room?
Ceiling fans may have fallen out of fashion for a while, but they’re once again building buzz as an easy and affordable energy-saving home upgrade. Modern fans look great, run quietly and deliver highly efficient air circulation. This keeps your home more consistently comfortable year-round, easing the burden on your HVAC system.
But to coax the best performance from your ceiling fan, sizing is critical. There’s a lot to think about, from the sweep and pitch of the blades to the correct mounting height and hardware. Here’s how to choose the best specs for your home and ensure safe, energy-efficient comfort, straight from the experts at Mister Sparky of Tampa, FL.
Why Ceiling Fan Size Matters
Think ceiling fan size is mostly a matter of aesthetics? Think again. The size of a ceiling fan determines how much air it moves at a given speed setting — measured in CFM (cubic feet per minute) — so it’s important to make sure your fan’s output matches the space it’s in.
Stick a too-small fan in a large room and it’s liable to struggle, wasting energy and producing more noise than airflow. Conversely, an oversized fan can make a smaller room feel too drafty, not to mention looking out of place. The goal, then, is to strike just the right balance between airflow, noise and energy efficiency.
The Three Keys to Ceiling Fan Installation
A ceiling fan’s size usually refers specifically to the total width of its blades, but that’s not the only measurement worth your attention. We’ve identified three key factors that can help you size your fan for optimal performance — here’s what you need to know.
Blade Span and Room Size
Also called blade sweep, blade span refers to the diameter of the fan as measured between the tips of two opposing blades. For fans with an odd number of blades, this can be calculated by doubling the distance from the tip of one blade to the center. Naturally, rooms with more square footage have more air to move, which requires a wider blade span.
Use this handy cheat sheet to determine the ideal range of ceiling fan sizes for your room:
- Up to 75 sq. ft: 29–36 in
- 75–144 sq. ft: 36–42 in
- 144–225 sq. ft: 42–50 in
- 225–400 sq. ft: 50–54 in
- Over 400 sq. ft: 60 in or larger
Mounting and Ceiling Height
Another crucial measure is the height at which your ceiling fan is mounted. You certainly don’t want a fan spinning so low that someone might get conked in the head, but hanging it up too high is no good if you can’t even feel its breeze. A mounting height of 8 to 9 ft is typically considered ideal, but always leave at least 7 ft of clearance between the fan blades and the floor for safety.
A flush mount is your best shot at maintaining this safe clearance height in rooms with very low ceilings. For particularly high ceilings, use a downrod mount to drop your ceiling fan to the perfect height for maximum circulation.
Blade Pitch and Motor Power
One variable that’s often overlooked is blade pitch, or the angle of each blade relative to horizontal. Steeper pitches generate more air movement with each rotation, but they also make more noise and require a stronger motor to drive the blades through the air. So, what are your options?
- Low Pitch (Under 10º): Very quiet and low-profile, but much less airflow. Best used for decorative purposes.
- Medium Pitch (11-15º): Typical range for most homes, offering the best balance of noise, efficiency and comfort.
- Steep Pitch (Over 16º): Highest airflow and most noise. Ideal for large, open spaces and rooms with vaulted ceilings.
Save Money With an Energy Efficient Ceiling Fan
Accurate sizing is a must if you want a ceiling fan that can save energy while still keeping you comfy. Of course, even that won’t matter much if your fan is an inefficient energy hog. Luckily, there’s an easy way to make sure you’re getting high-quality equipment that won’t send your utility bills to the Moon.
Just look for the ENERGY STAR label, which is awarded to products that meet stringent efficiency guidelines in independent performance testing. These energy efficient ceiling fans use up to 44% less energy than non-certified models, helping you further lower energy costs and keep a cleaner carbon footprint.
Mister Sparky’s Top Ceiling Fan Do’s and Don’ts
It’s not quite rocket surgery, but installing a ceiling fan does require a fair bit of skill and planning. Electrical work carries inherent risks, not to mention the obvious danger of hanging spinning blades above your head. Make sure everything goes smoothly by following these foolproof ceiling fan safe installation tips from the expert electricians at Mister Sparky of Tampa, FL:
DO: Shut Off Power at the Breaker Box
Before laying hands on any electrical fixture, always power down the circuit via the breaker box. Follow up by using a non-contact voltage tester on the wires to confirm there’s no juice in the circuit. These steps only take a few minutes, but they’re vital to preventing painful electrical shocks — or worse.
DO: Use a Fan-Rated Junction Box
Standard electrical boxes are just fine for run-of-the-mill light fixtures, but they can’t withstand the weight and vibration of a ceiling fan. To ensure your new fixture’s properly supported, verify that your box is UL-listed and clearly marked for use with ceiling fans. It should also be secured to a structural joist or beam overhead, either by attaching the box directly or by incorporating a heavy-duty brace.
DO: Check (and Recheck) All Wiring
Color codes for ceiling fan wiring may vary between manufacturers, so follow your instruction manual closely. Find the correct wiring diagram for your particular setup and check each wire pair individually, completing the connection with wire nuts or push-in connectors. Finally, double-check that all connections are secure and tuck the ceiling fan wiring inside the junction box.
DON’T: Install an Ungrounded Ceiling Fan
Running a ceiling fan without grounding is more than a bad idea — it’s a hazard waiting to happen. The ground wire in the ceiling must be connected to the junction box or fan motor, forming a safe escape path for dangerous fault currents. If there’s no ground wire available, you’ll need an electrician to upgrade the circuit’s wiring or install a GFCI breaker.
DON’T: Skip the Professional Inspection
Here in Florida, most ceiling fan installations require expert inspection upon completion. Even if it’s not mandatory for the project, it’s still wise to have your work reviewed by a pro. A licensed electrician can assess your ceiling fan wiring, test the controls, check the mounting and balancing and more, ensuring everything is 100% code-compliant.
Add Style and Function to Any Room in Your Home
Despite their not-entirely-unjustified reputation, ceiling fans don’t have to be boring eyesores. In fact, if you’ll allow us a corny pun, a tastefully chosen fan can make your home cooler in more ways than one. Modern ceiling fans come in a wide array of styles, finishes and materials, offering options to match whatever aesthetic you desire.
While some models blend discreetly into their surroundings, others are designed to stand out as the centerpiece of a room. Sizing can further enhance these effects, with larger blades and lower mounting points making a more striking visual impact.
Tampa Mister Sparky Makes Ceiling Fan Installation a Breeze
Ceiling fans can help keep you comfy, lower energy costs and even add a splash of style to your home decor, but finding the right fit can be a headache. If you’re looking for a low-cost, high-impact home addition, don’t put up with any malarky — call Mister Sparky!
We’re a trusted name in the Tampa Bay area, and we’re here to take the stress out of ceiling fan installation. Our licensed local electricians will handle everything, from sizing and mounting your fan for optimal air circulation to performing a complete safety and performance inspection. We stand behind our work with a 100% satisfaction guarantee, so why not call and get started today?
FAQ’s – Choosing the Right Ceiling Fan Size
How do I know what size ceiling fan I need for my room?
Ceiling fan size is typically determined by the room’s square footage and the blade span recommended for that space.
What size ceiling fan is best for a small room?
Small rooms under about 100 square feet usually work best with ceiling fans that have a blade span of 29 to 36 inches.
What size ceiling fan should I use for a medium-sized room?
Rooms between about 100 and 300 square feet often use ceiling fans with blade spans of 42 to 52 inches.
What size ceiling fan is recommended for large rooms?
Large rooms over 300 square feet may require ceiling fans with blade spans of 52 inches or larger.
Can a ceiling fan be too big for a room?
Yes. An oversized fan can overpower the space, leading to excessive airflow or noise.
Does ceiling height affect ceiling fan size?
Yes. Ceiling height affects the mounting style and downrod length needed for proper airflow and safety.
How high should a ceiling fan be installed from the floor?
Most ceiling fans should be installed about 8 to 9 feet above the floor for optimal airflow.
How far should a ceiling fan be from the walls?
Ceiling fan blades should generally be at least 18 inches away from walls for proper airflow and safety.
Can one ceiling fan cool a large open room?
In large open spaces, you may need multiple ceiling fans or a larger model designed for bigger areas.
Do ceiling fans help reduce energy costs?
Yes. Ceiling fans help circulate air, allowing homeowners to raise the thermostat setting and reduce cooling costs.
Are ceiling fans with more blades better?
Not necessarily. Blade count affects airflow style, but motor quality and blade design are more important for performance.
Should I call an electrician to install a ceiling fan?
If new wiring, switches, or ceiling modifications are needed, it’s best to have a licensed electrician perform the installation.